
Create a Flow
In this section, we cover how to create a Flow. In a TakeTurns Flow, you and your external stakeholders share files, request documents, exchange and track revisions, or chat. Flows are asynchronous, so both parties work at their own pace - and with their own tools - without the risk of conflicting edits.
Available in plans | FREE INVITEE STARTER PLUS ULTIMATE |
Let’s create a Flow! Here’s how:
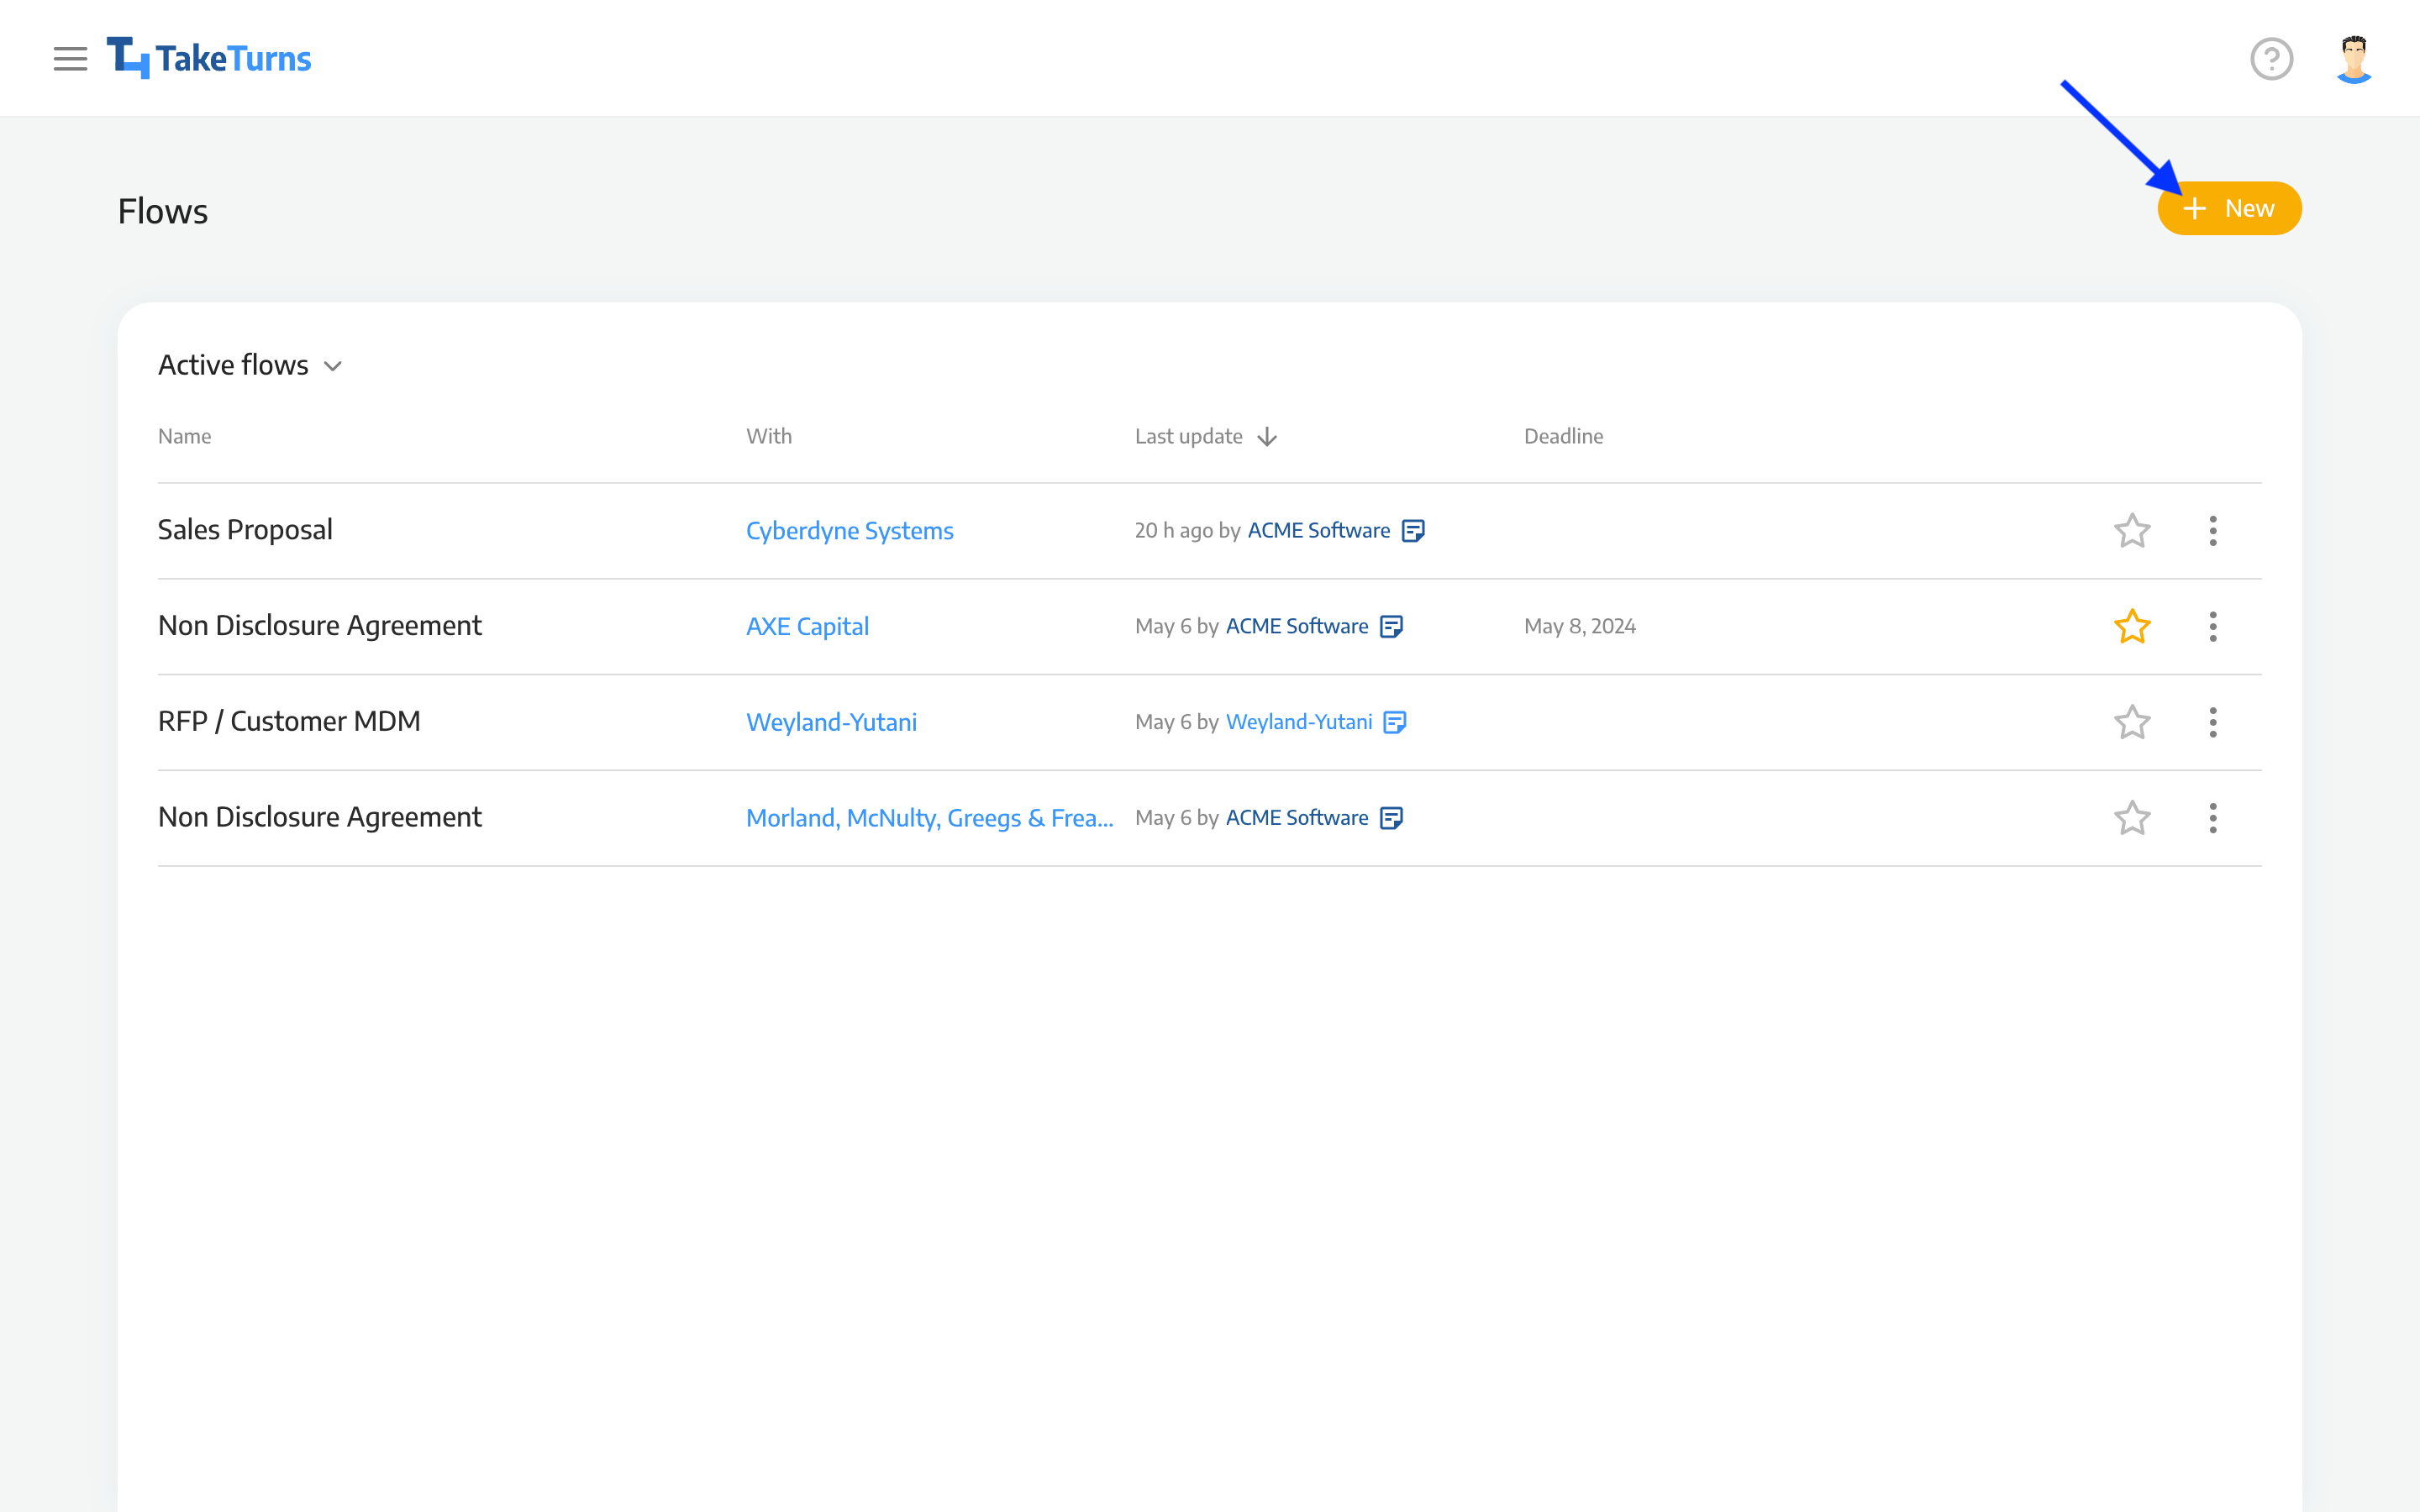
Click on the + New button at the top right corner of the main Flow list screen, or open the main menu (and click on the + New button there). This will open the New Flow Screen.
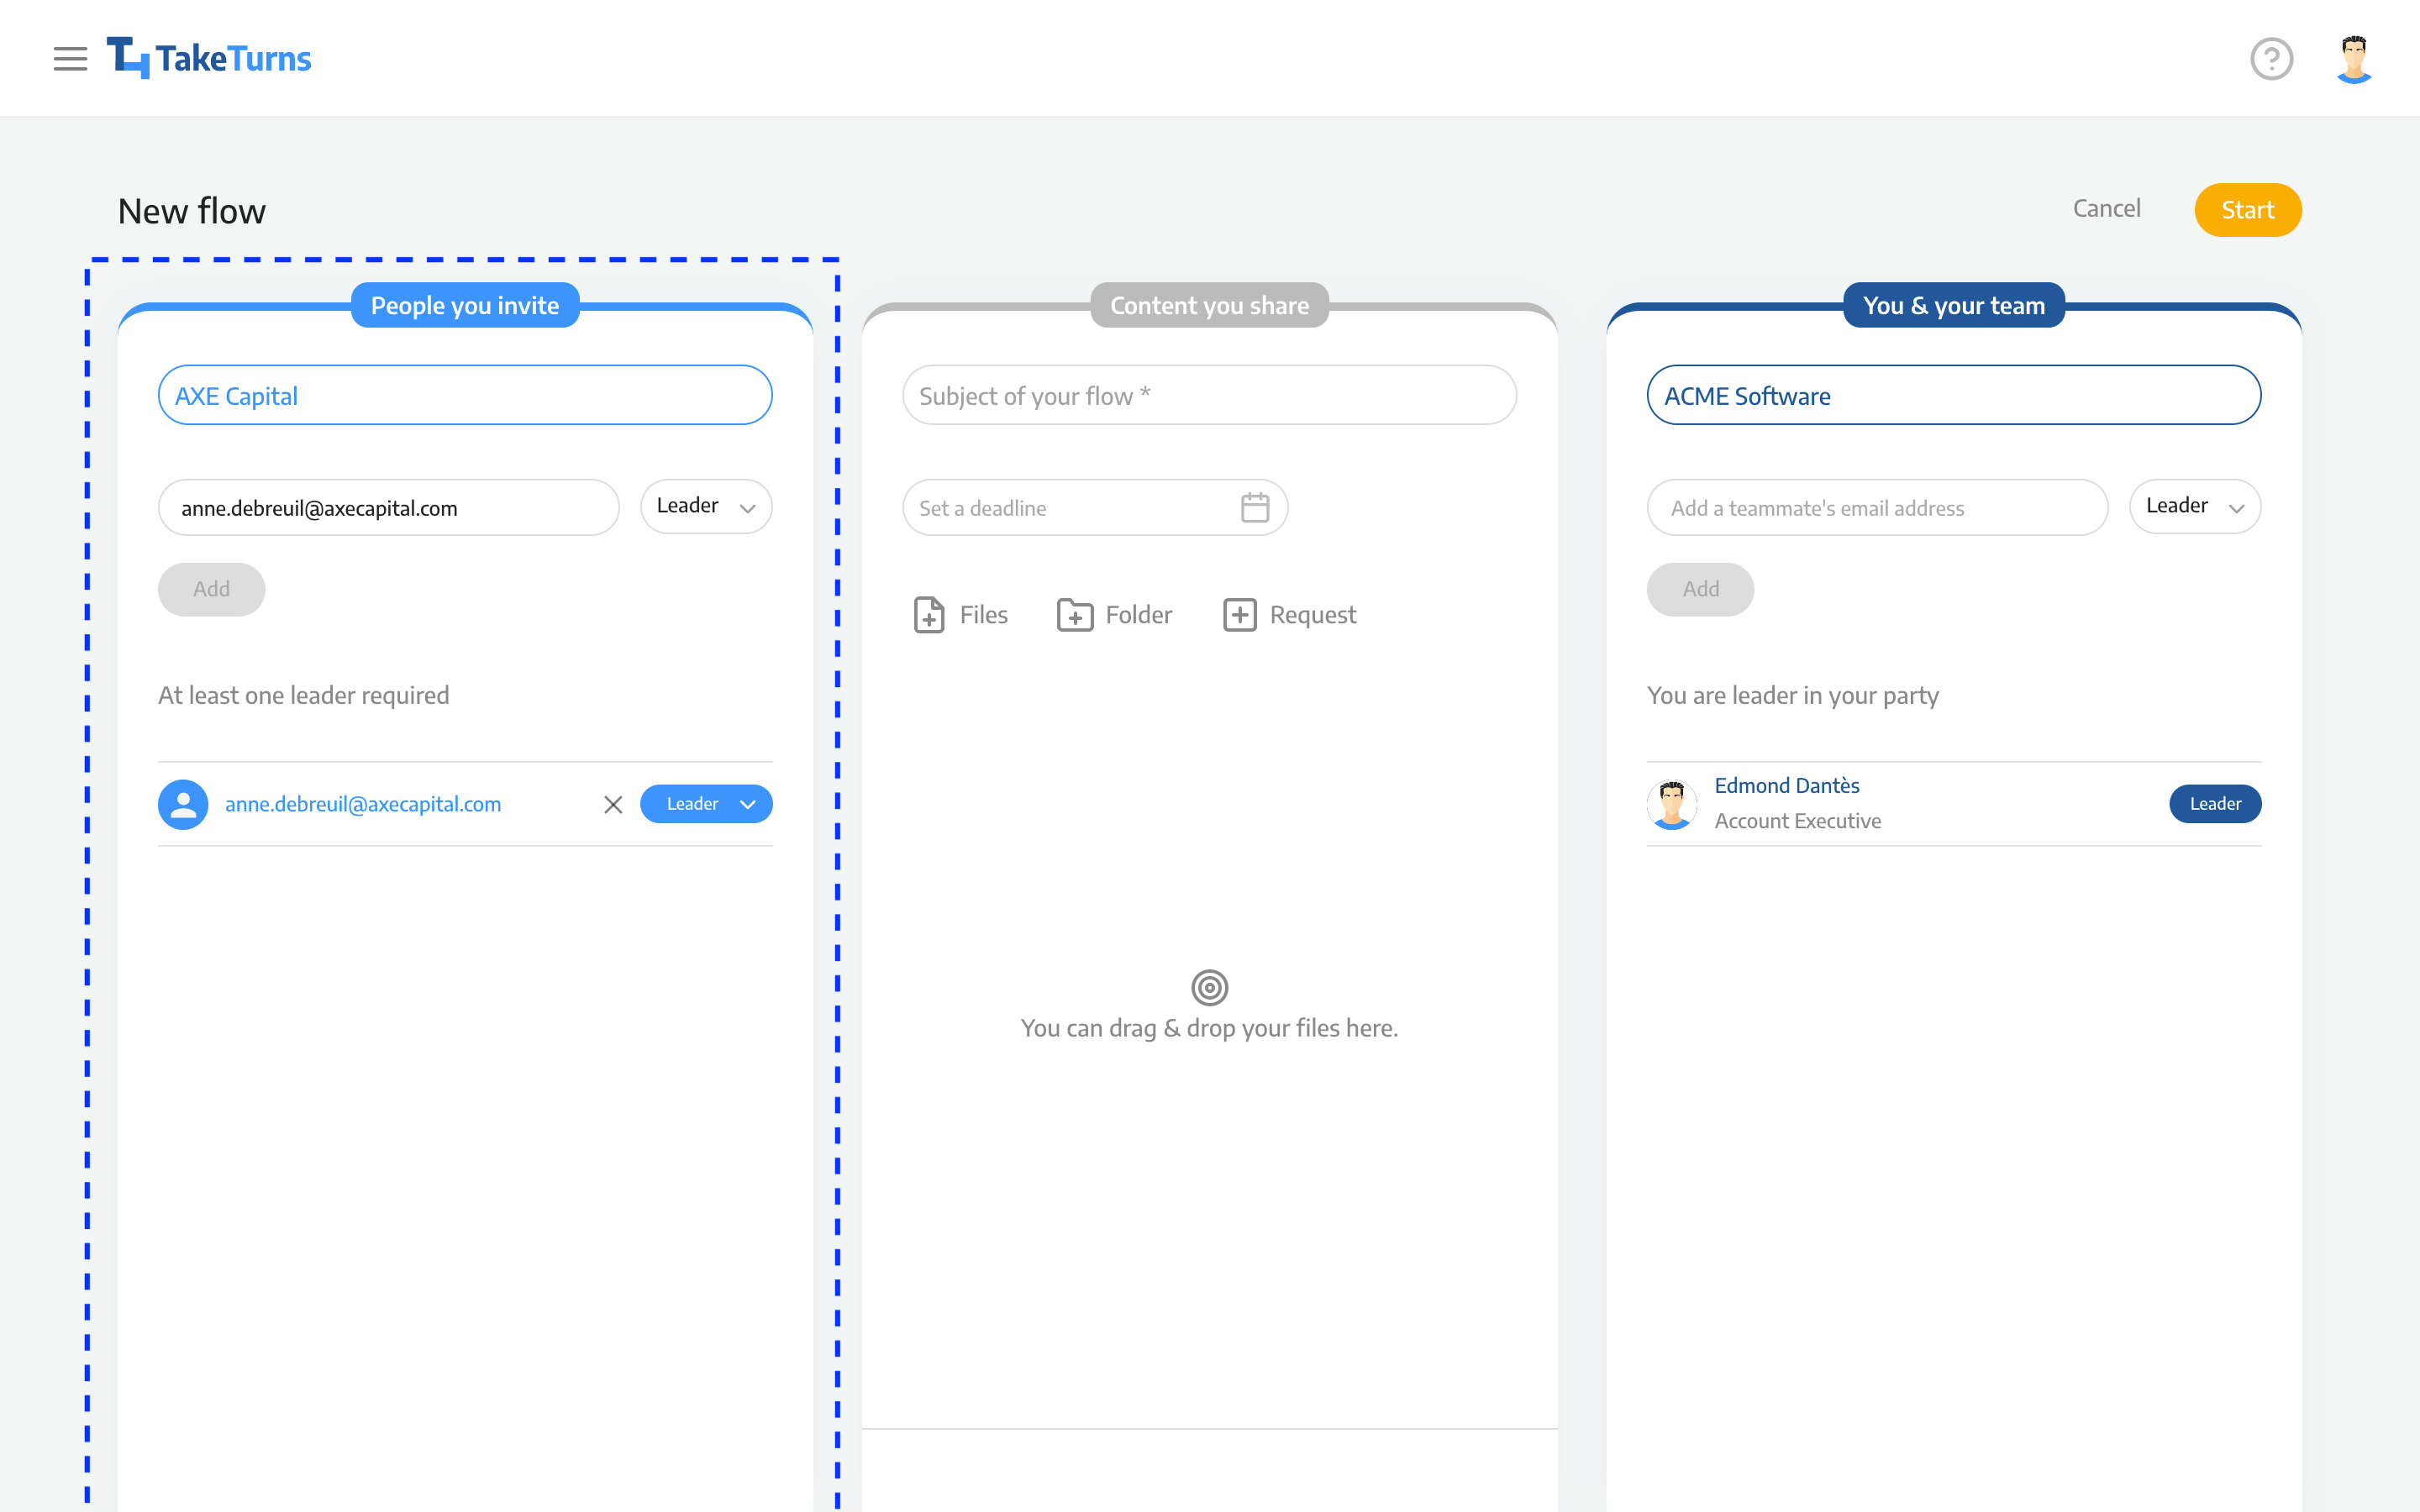
Under People you invite, enter the name of the other party (typically the organization name) and the email addresses of all the participants from that organization and their roles.
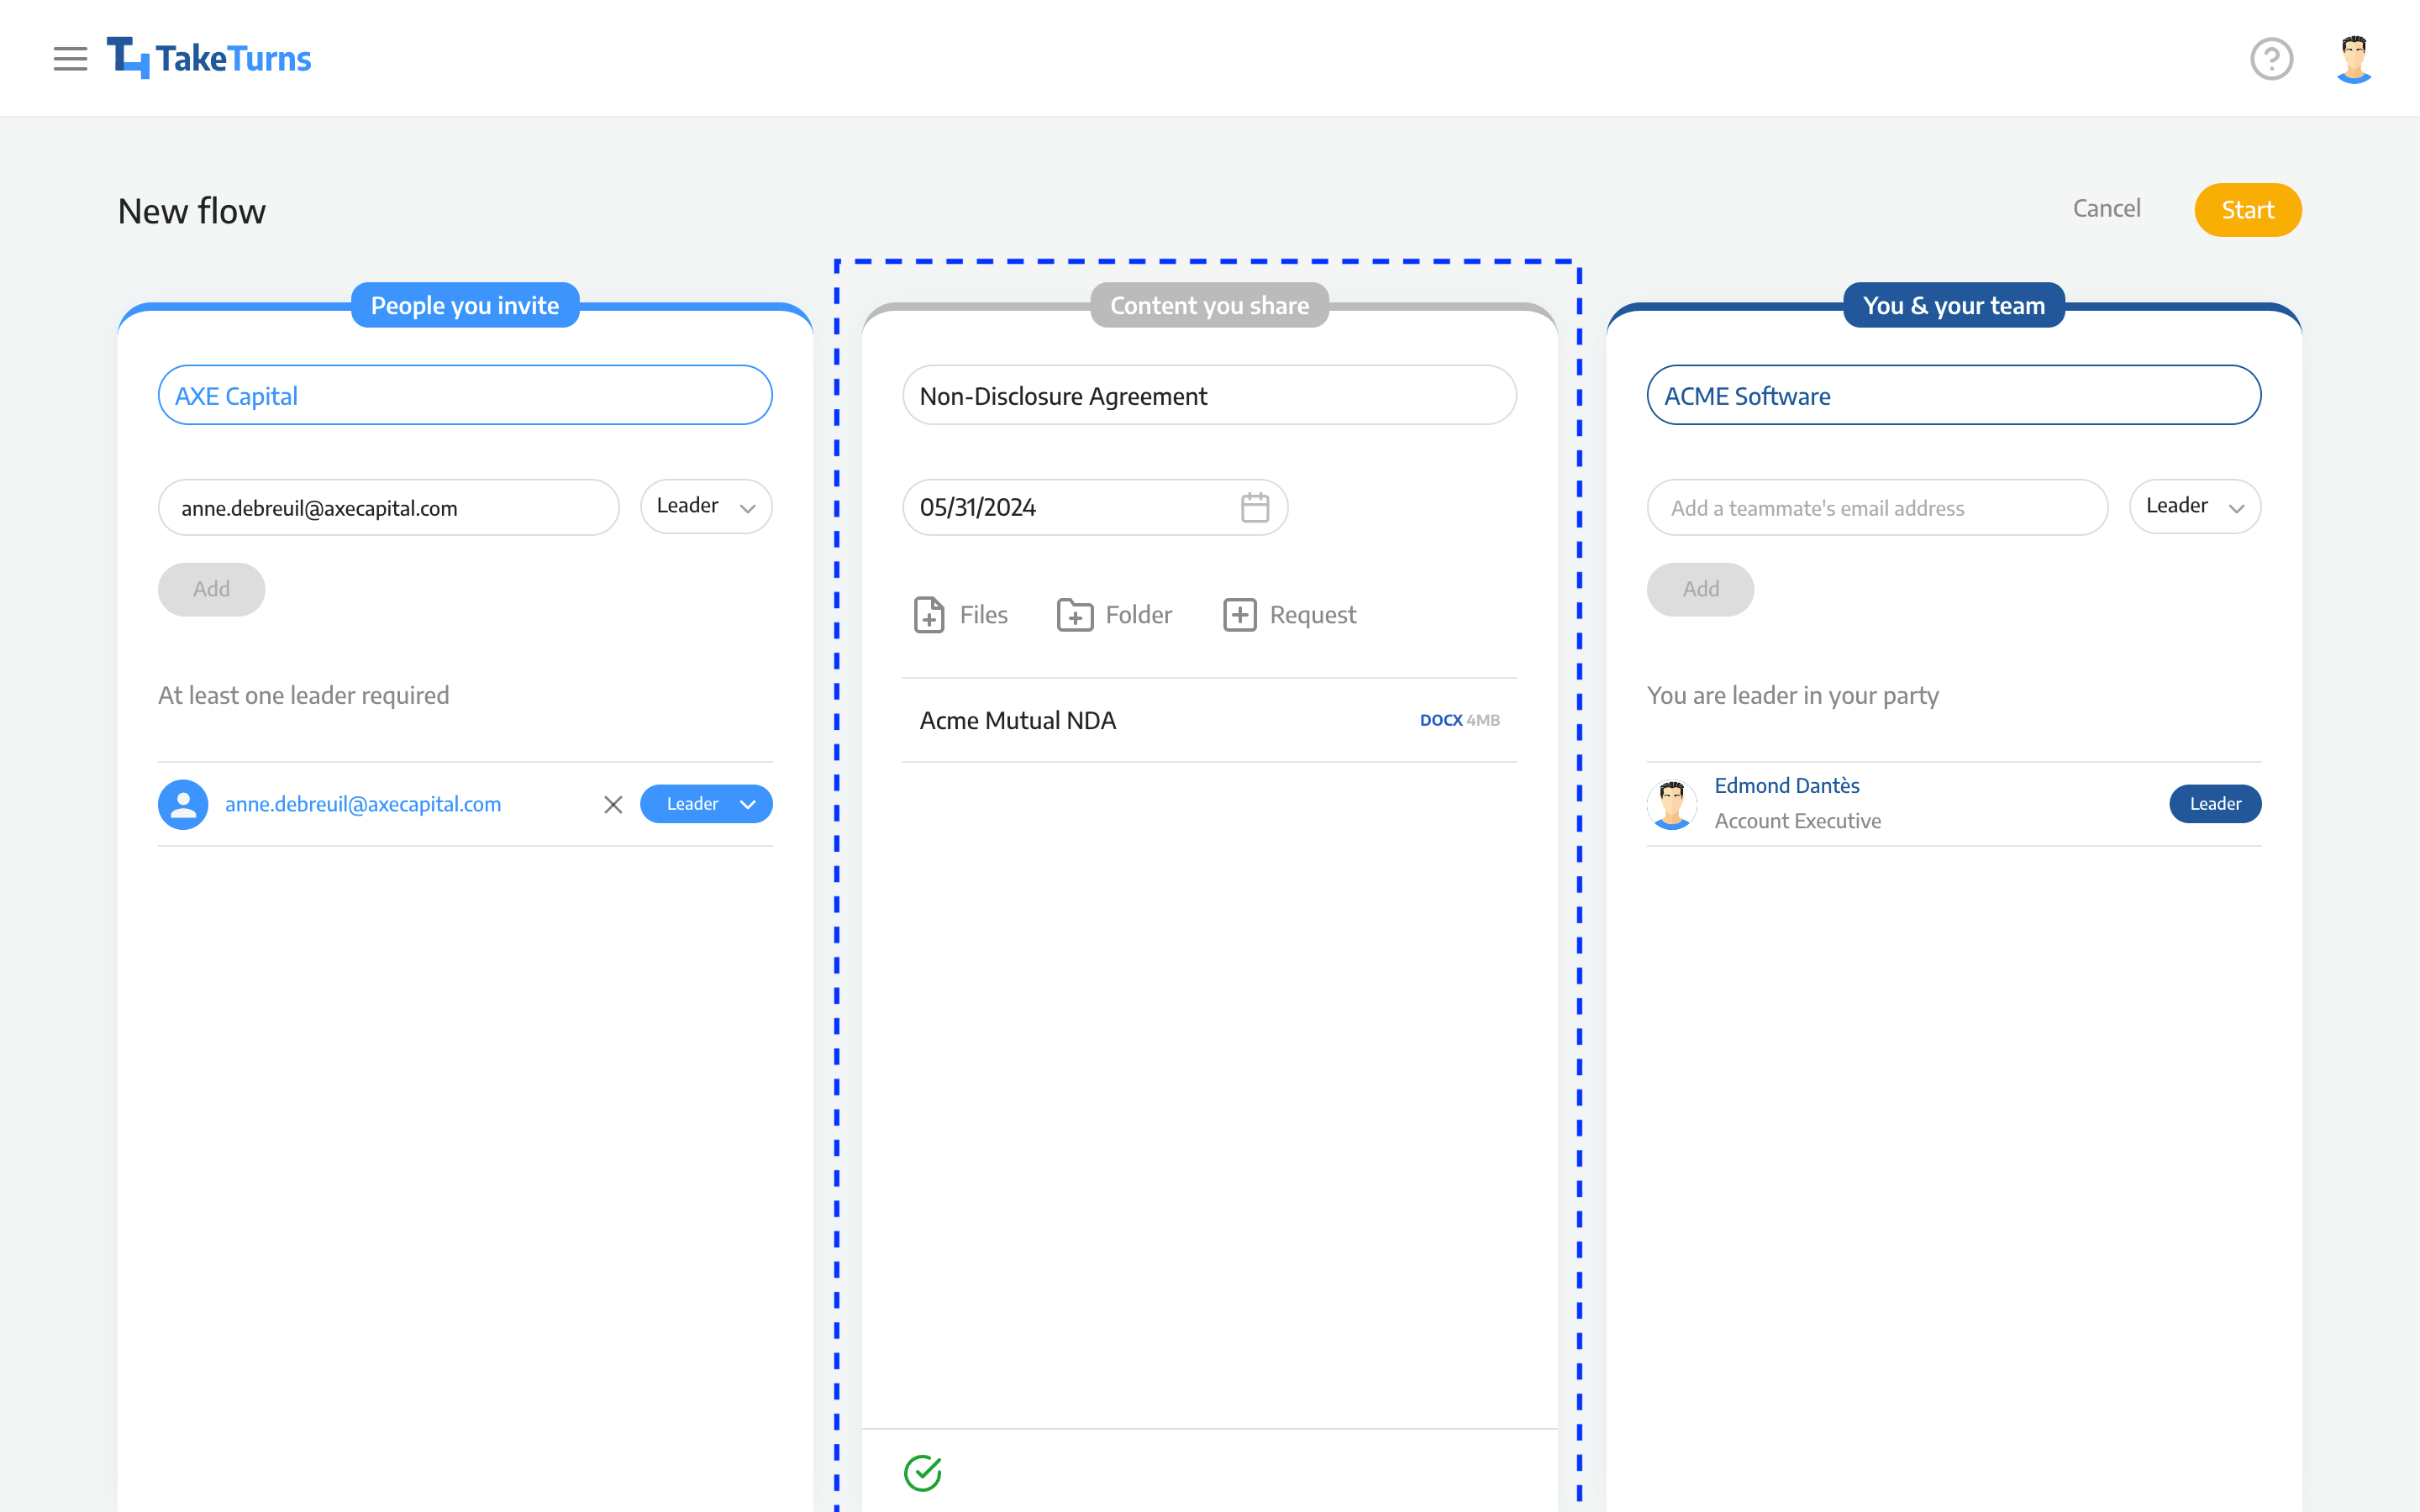
Under Content you share, enter the Flow's subject and deadline (if necessary), and attach content or requests.
Under You & your team, TakeTurns will auto-populate your organization and contact details from your profile. Add the email addresses of your team members participating in the Flow and set their roles.
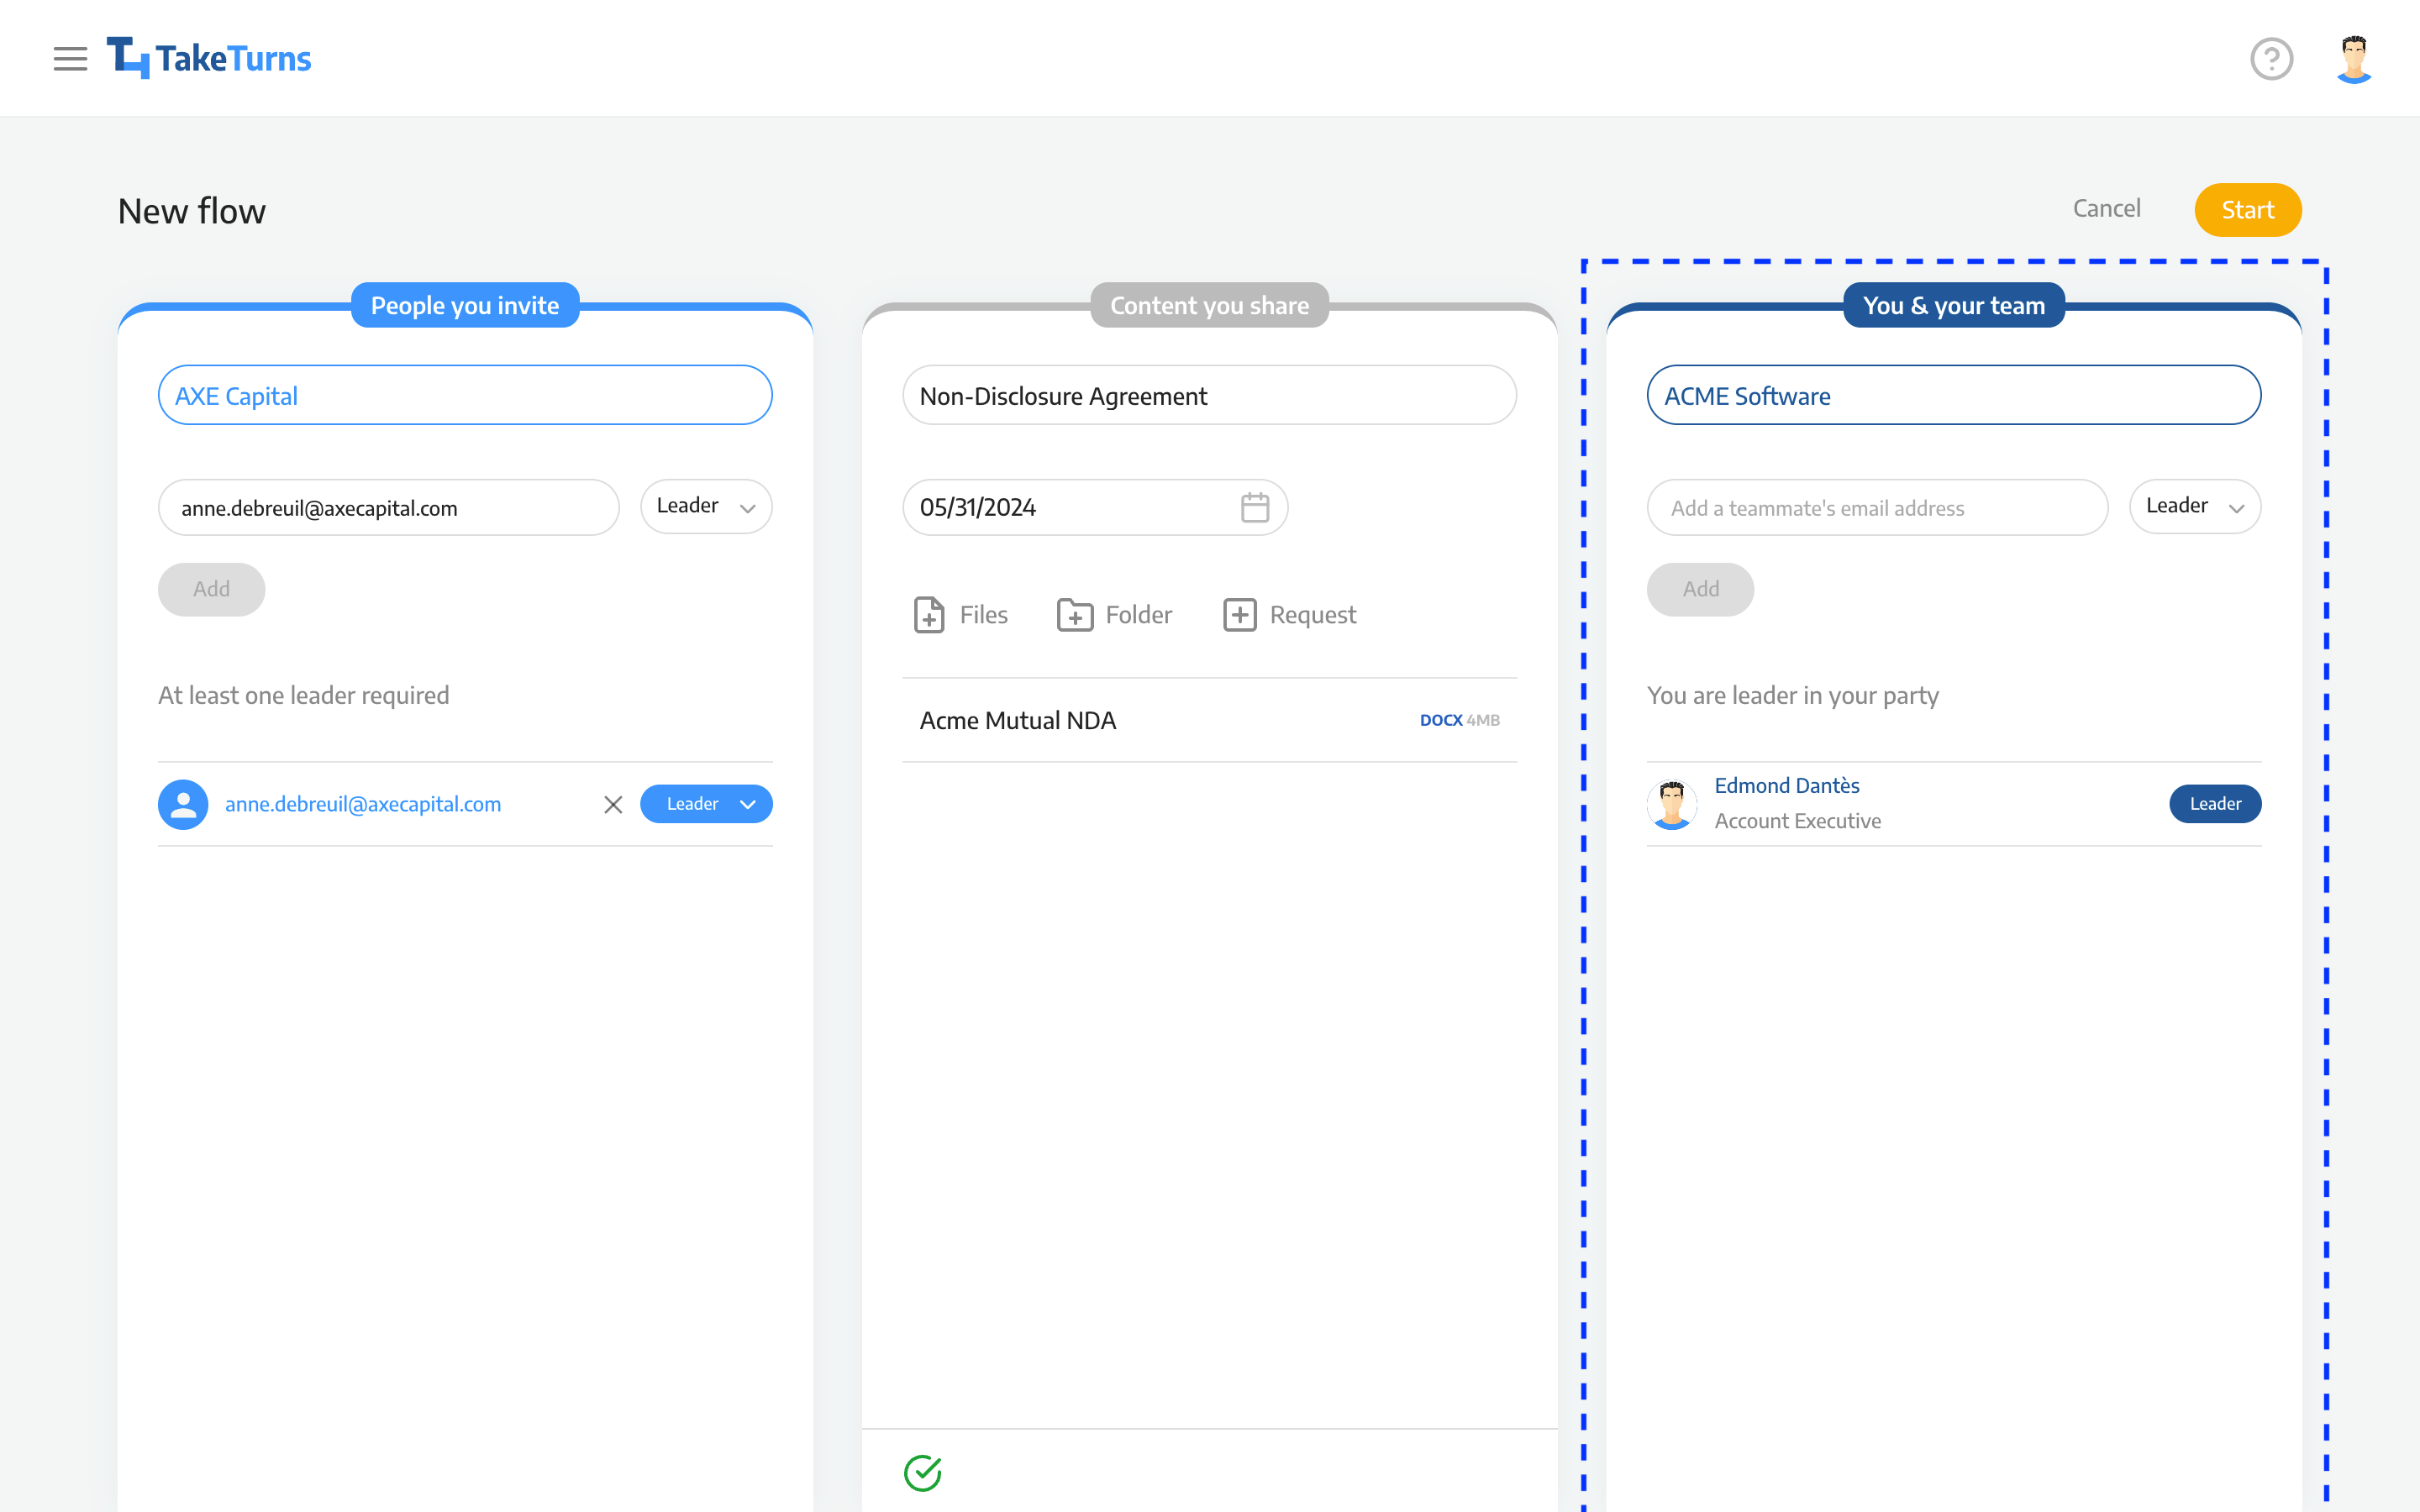
Click Start to save the details of your flow. TakeTurns will open a new screen where you can enter a note to the other party.
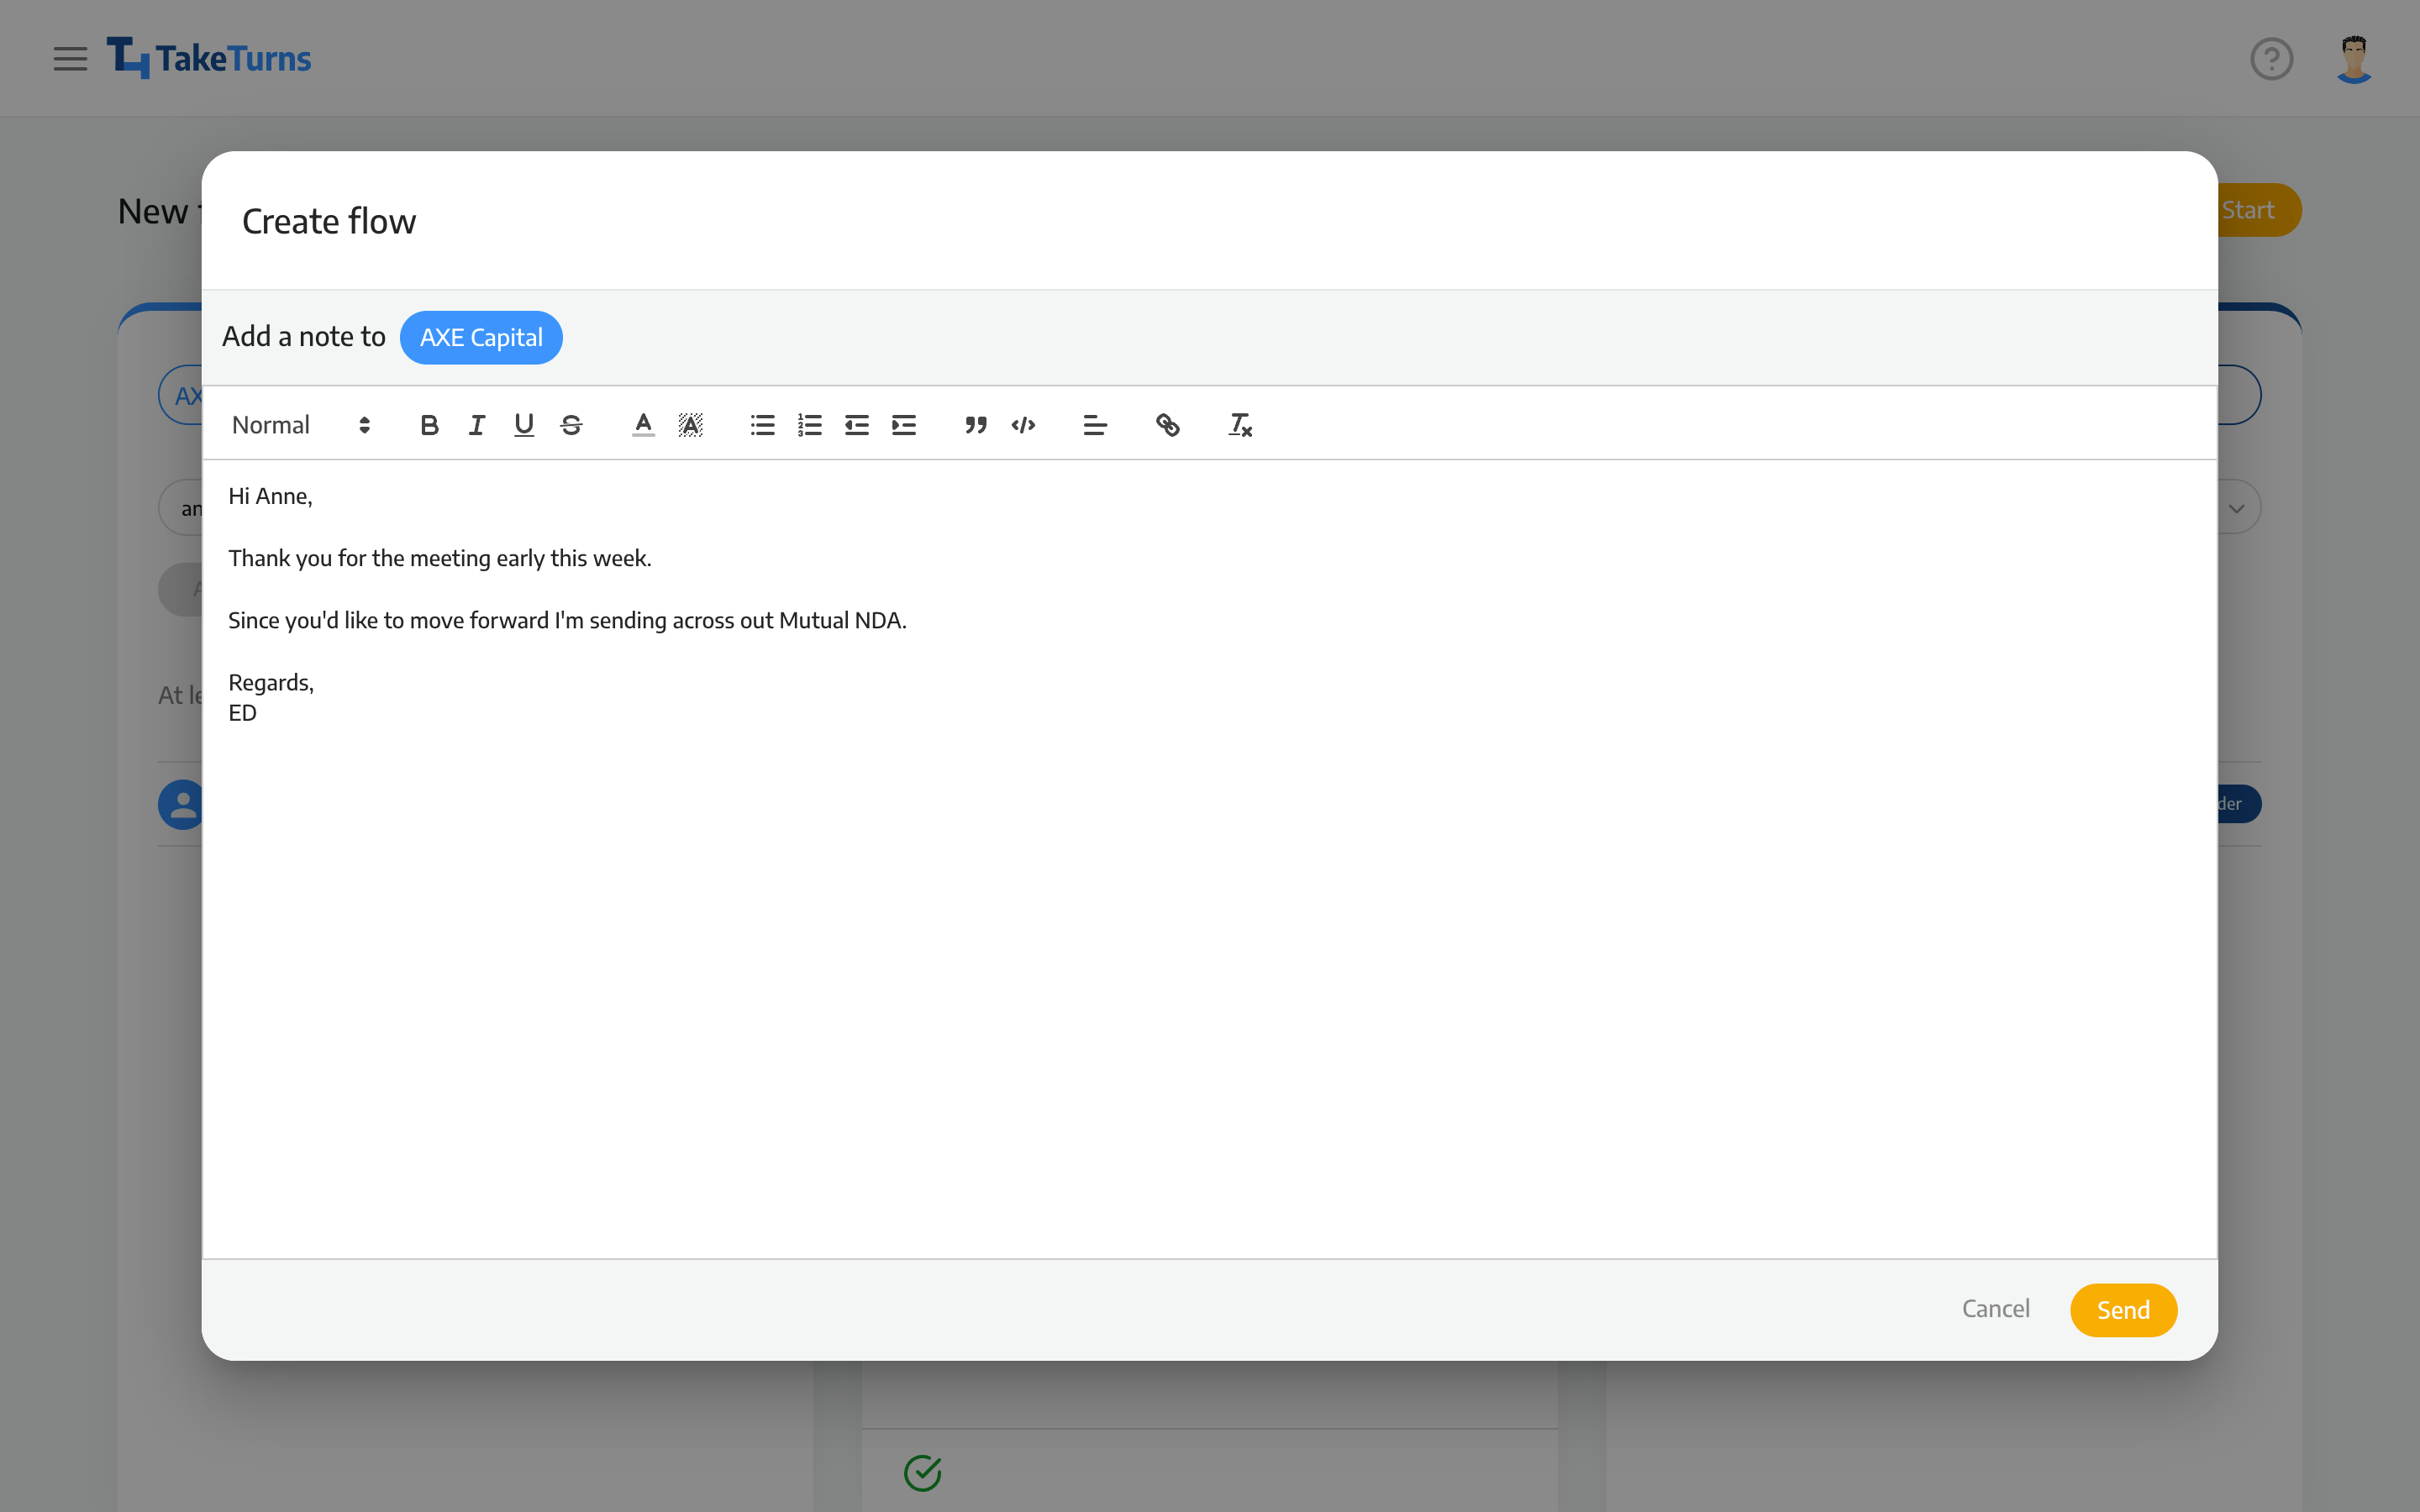
After you’ve entered your message, hit Send to start the Flow.
What if I’m using a mobile device?
If you’re using a mobile device, such as a smartphone, the creation screens are organized into a “wizard” that accommodates the smaller screen resolution and guides you through the process.
Click on the yellow + button at the bottom of your screen to create a new Flow. This launches a flow creation wizard.

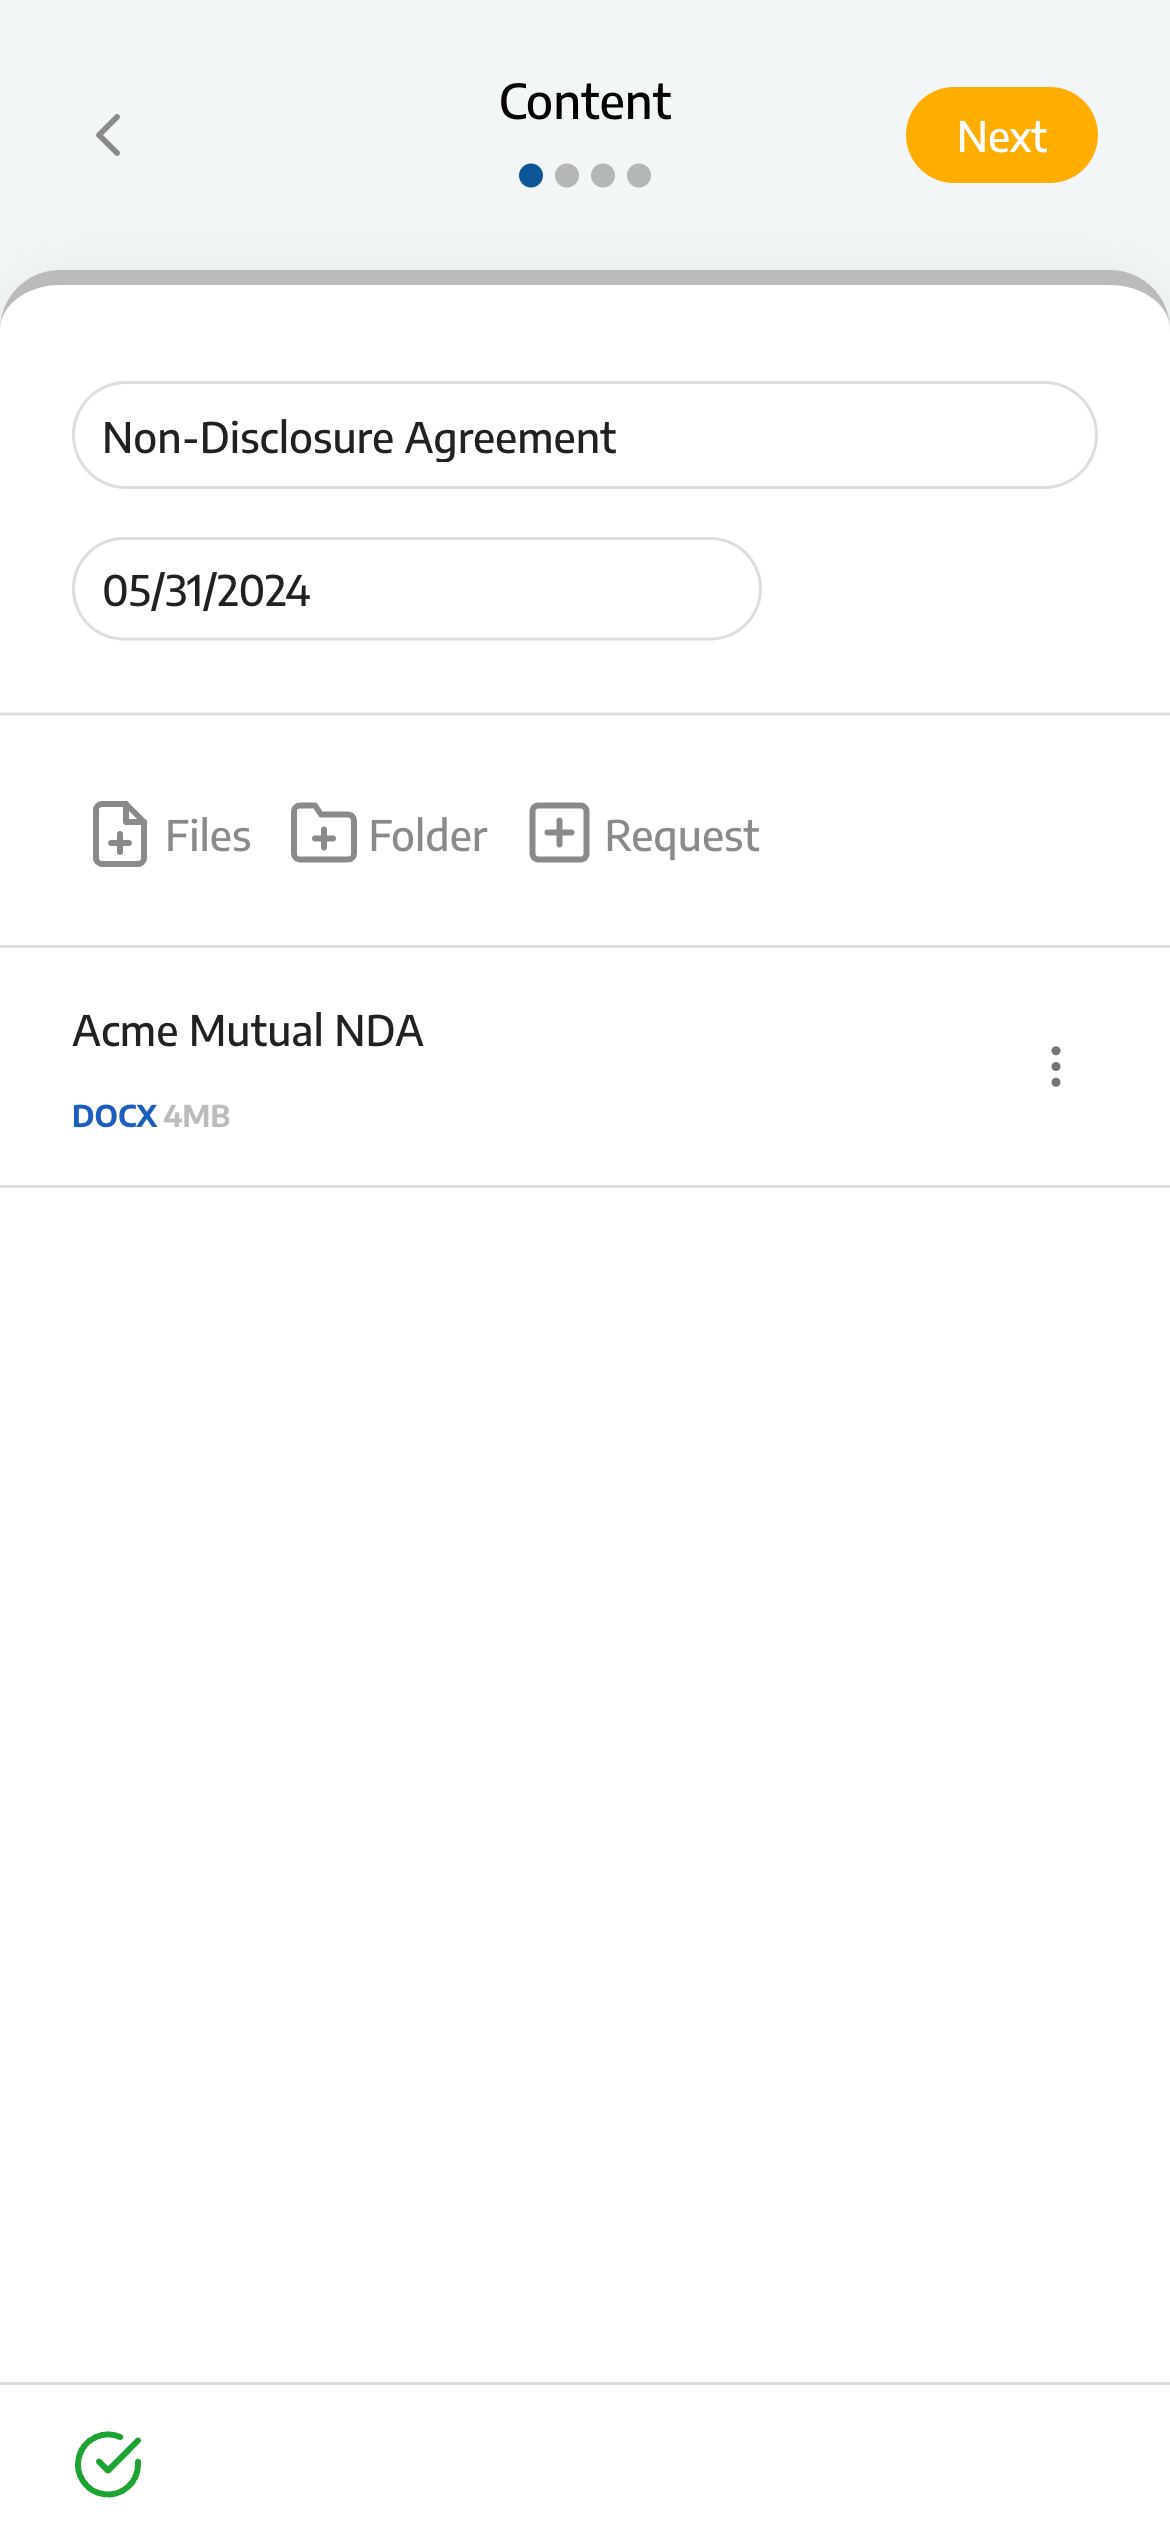
On the Content step, enter the Flow's subject and deadline (if necessary), and attach content or requests. Click Next to continue.
On the Your Invitees step, enter the other party's name (typically the organization's name) and the email addresses of all the participants from that organization and their roles. Click Next to continue.

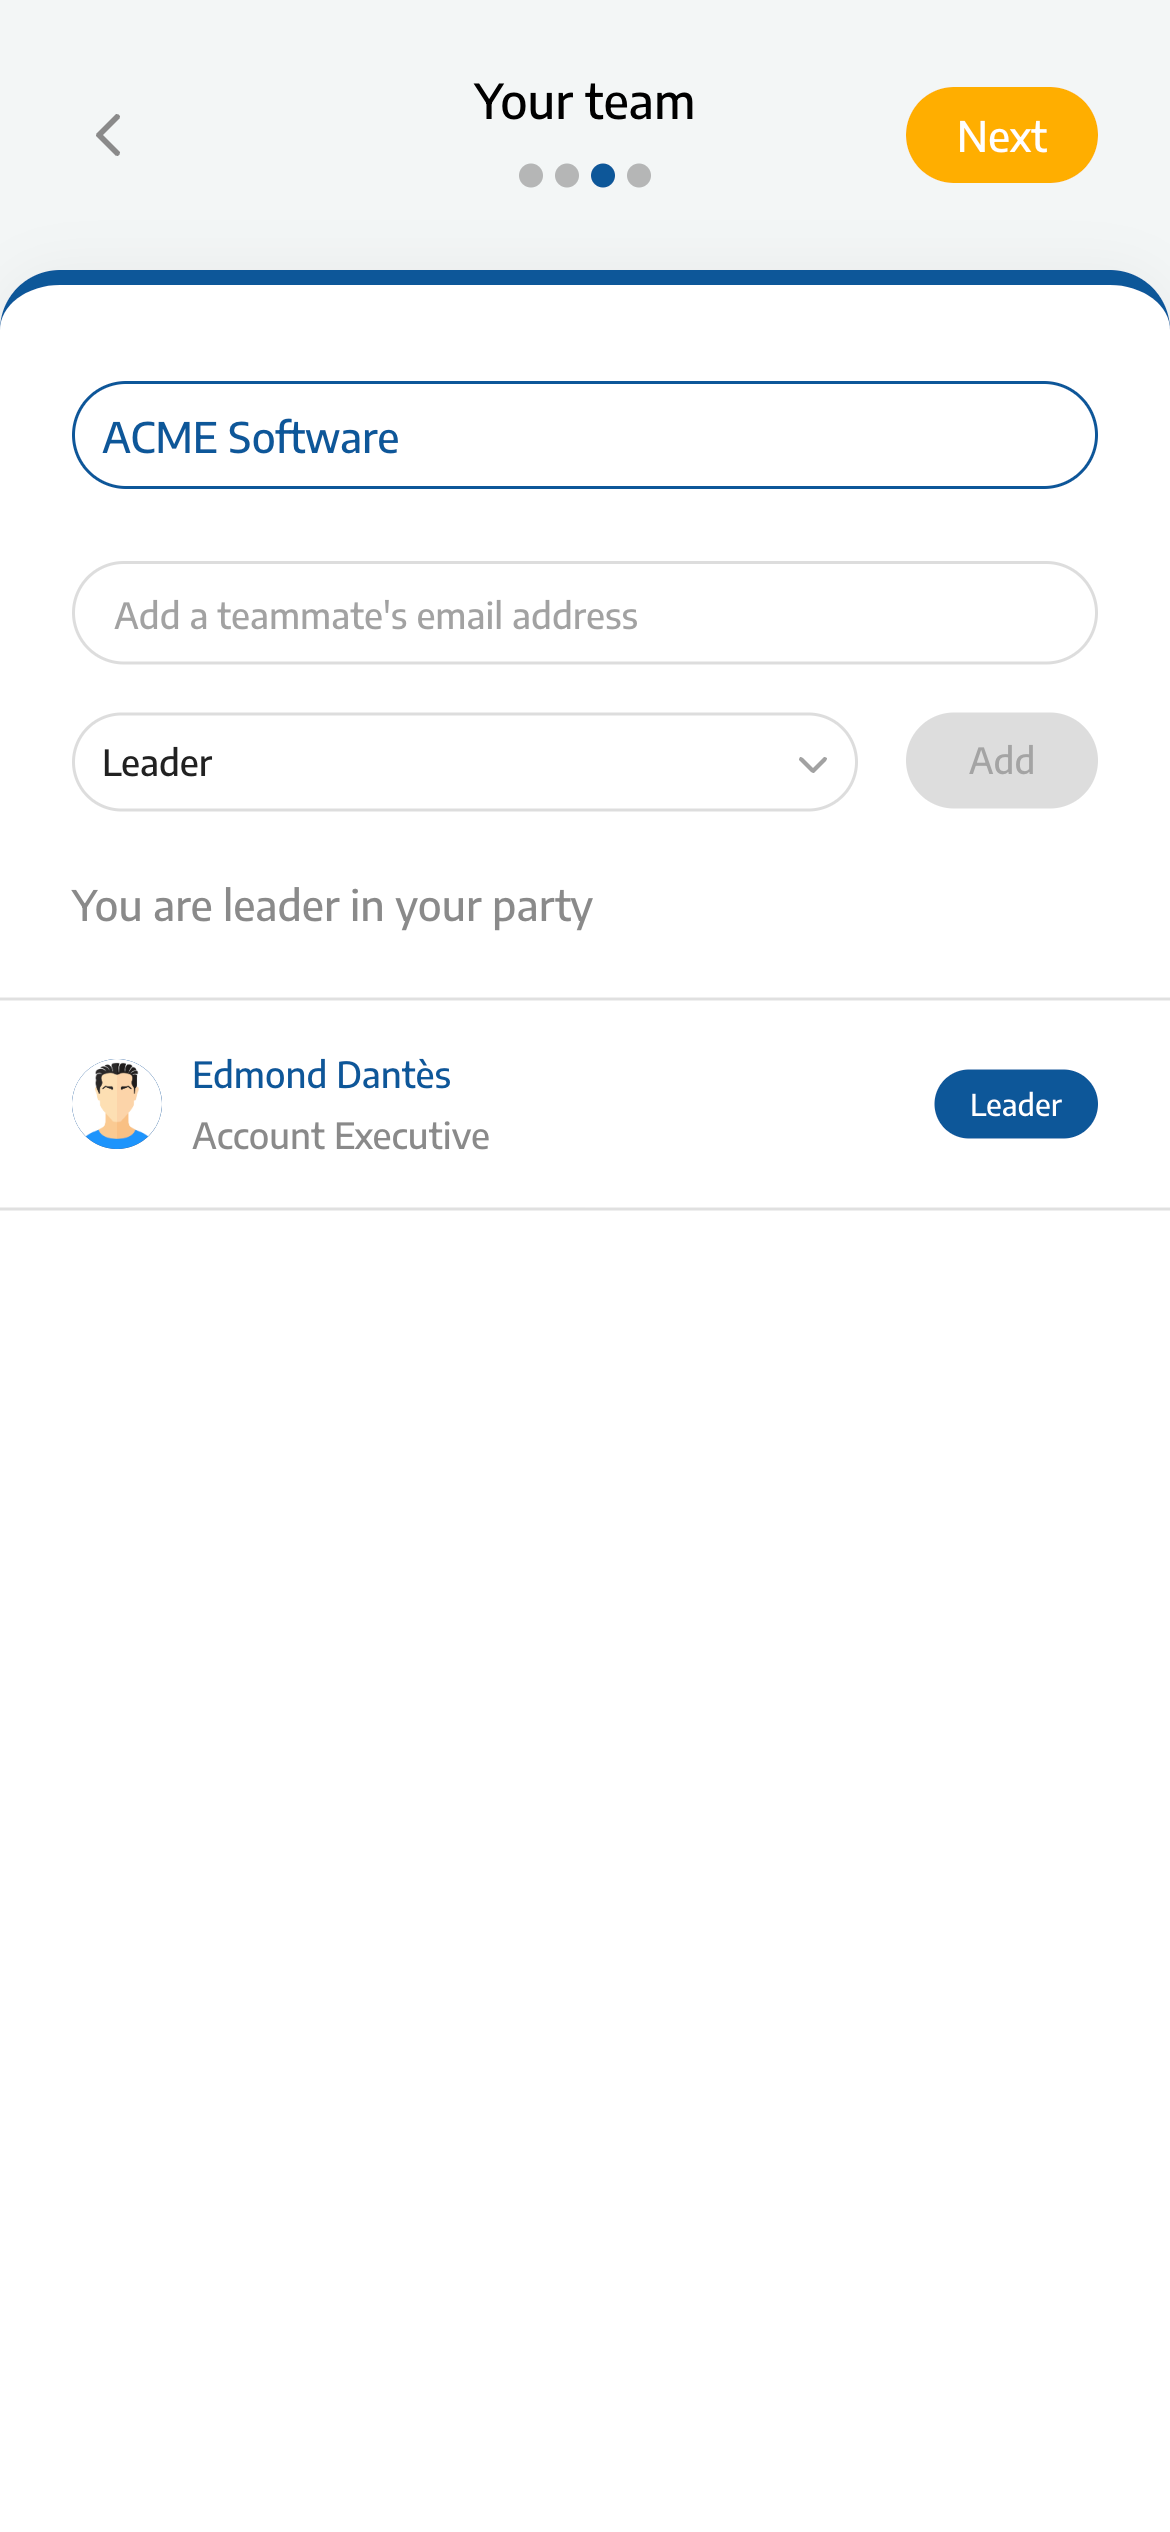
On the Your Team step, TakeTurns will auto-populate your organization and contact details from your profile. Add the email addresses of your team members participating in the Flow and set their roles. Click Next to continue.
Finally, in the Add a note step, enter a note for the other party. Click Send to start the Flow.

Quick Creation Screens
If you’re only trying to share files or collect documents, you can use the quick creation screens to create a new Flow quickly.
Click on the + NEW button, and choose either Quick File Sharing or Quick File Request from the menu.
These will open simplified creation screens.
Quick File Share | Quick File Request |
|---|---|
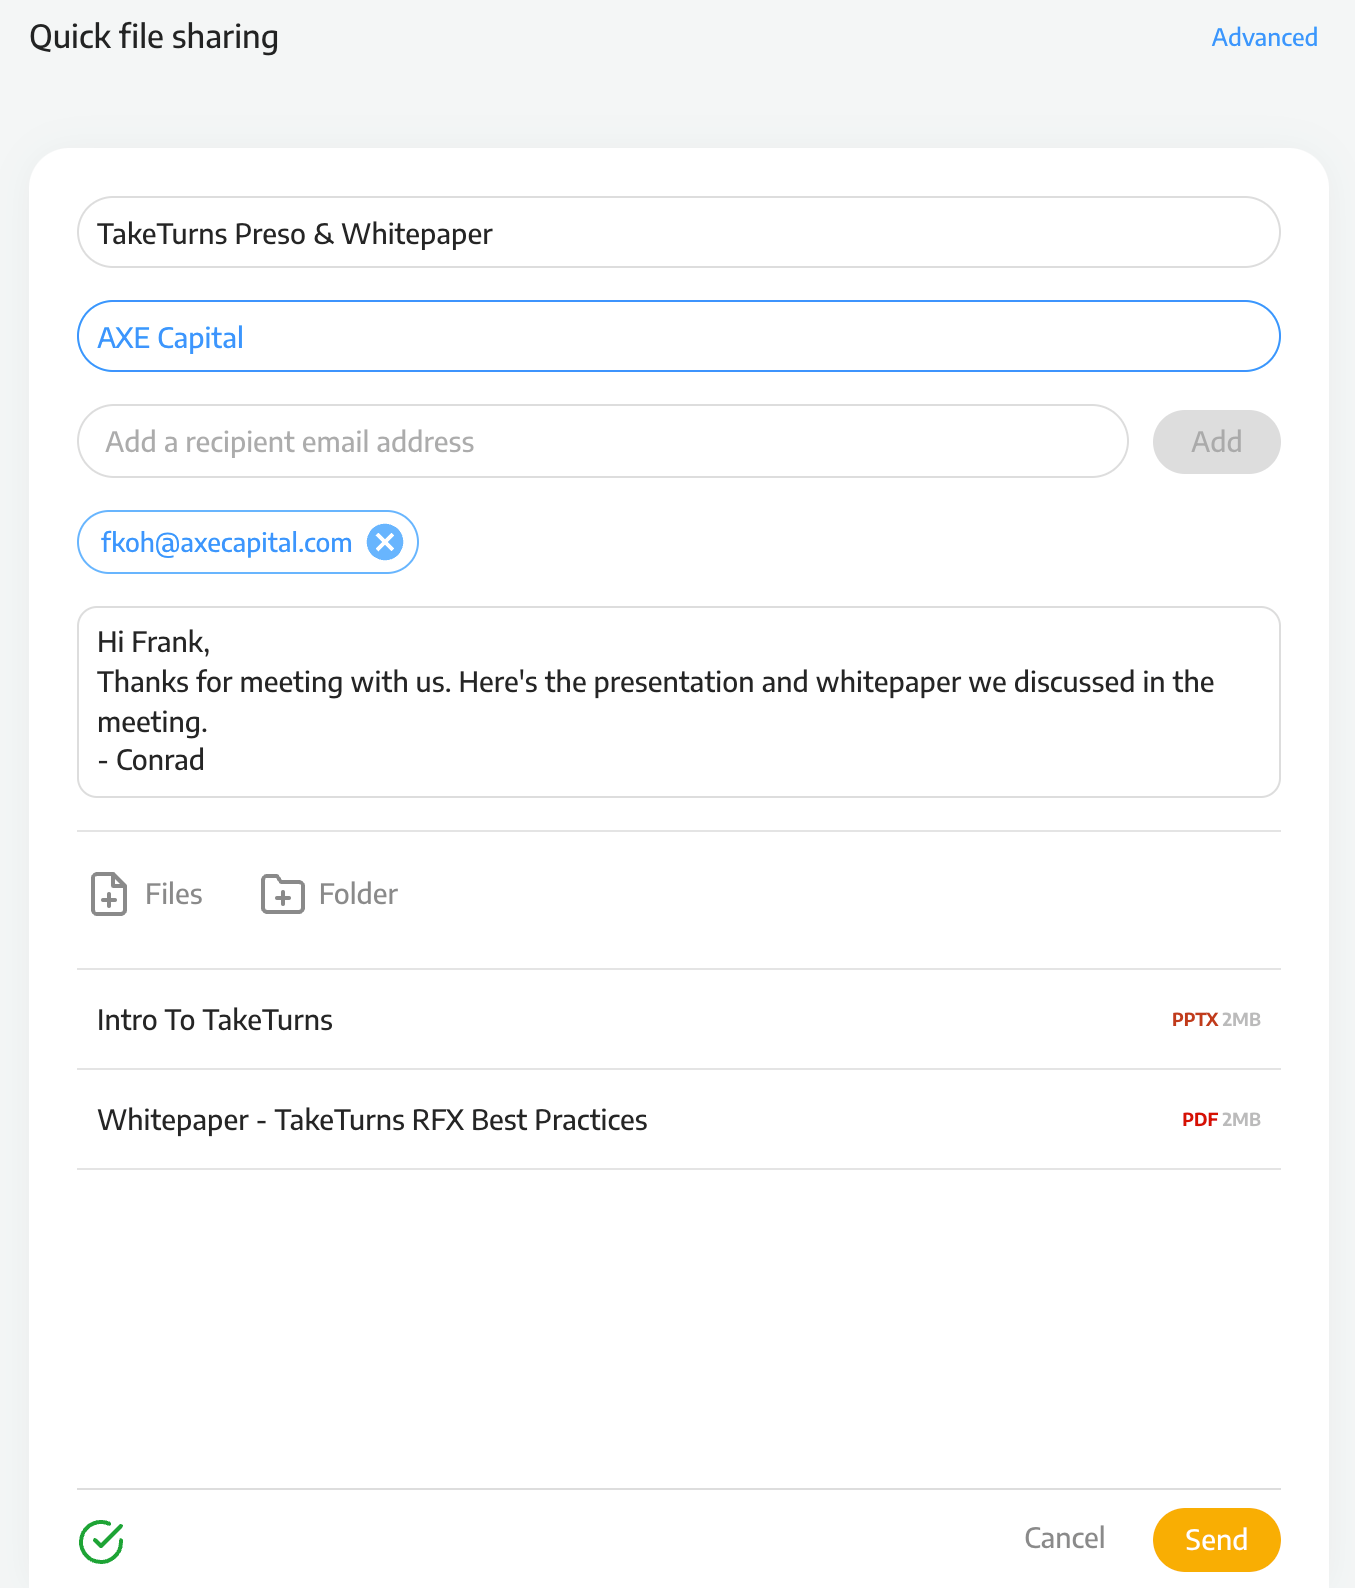 | 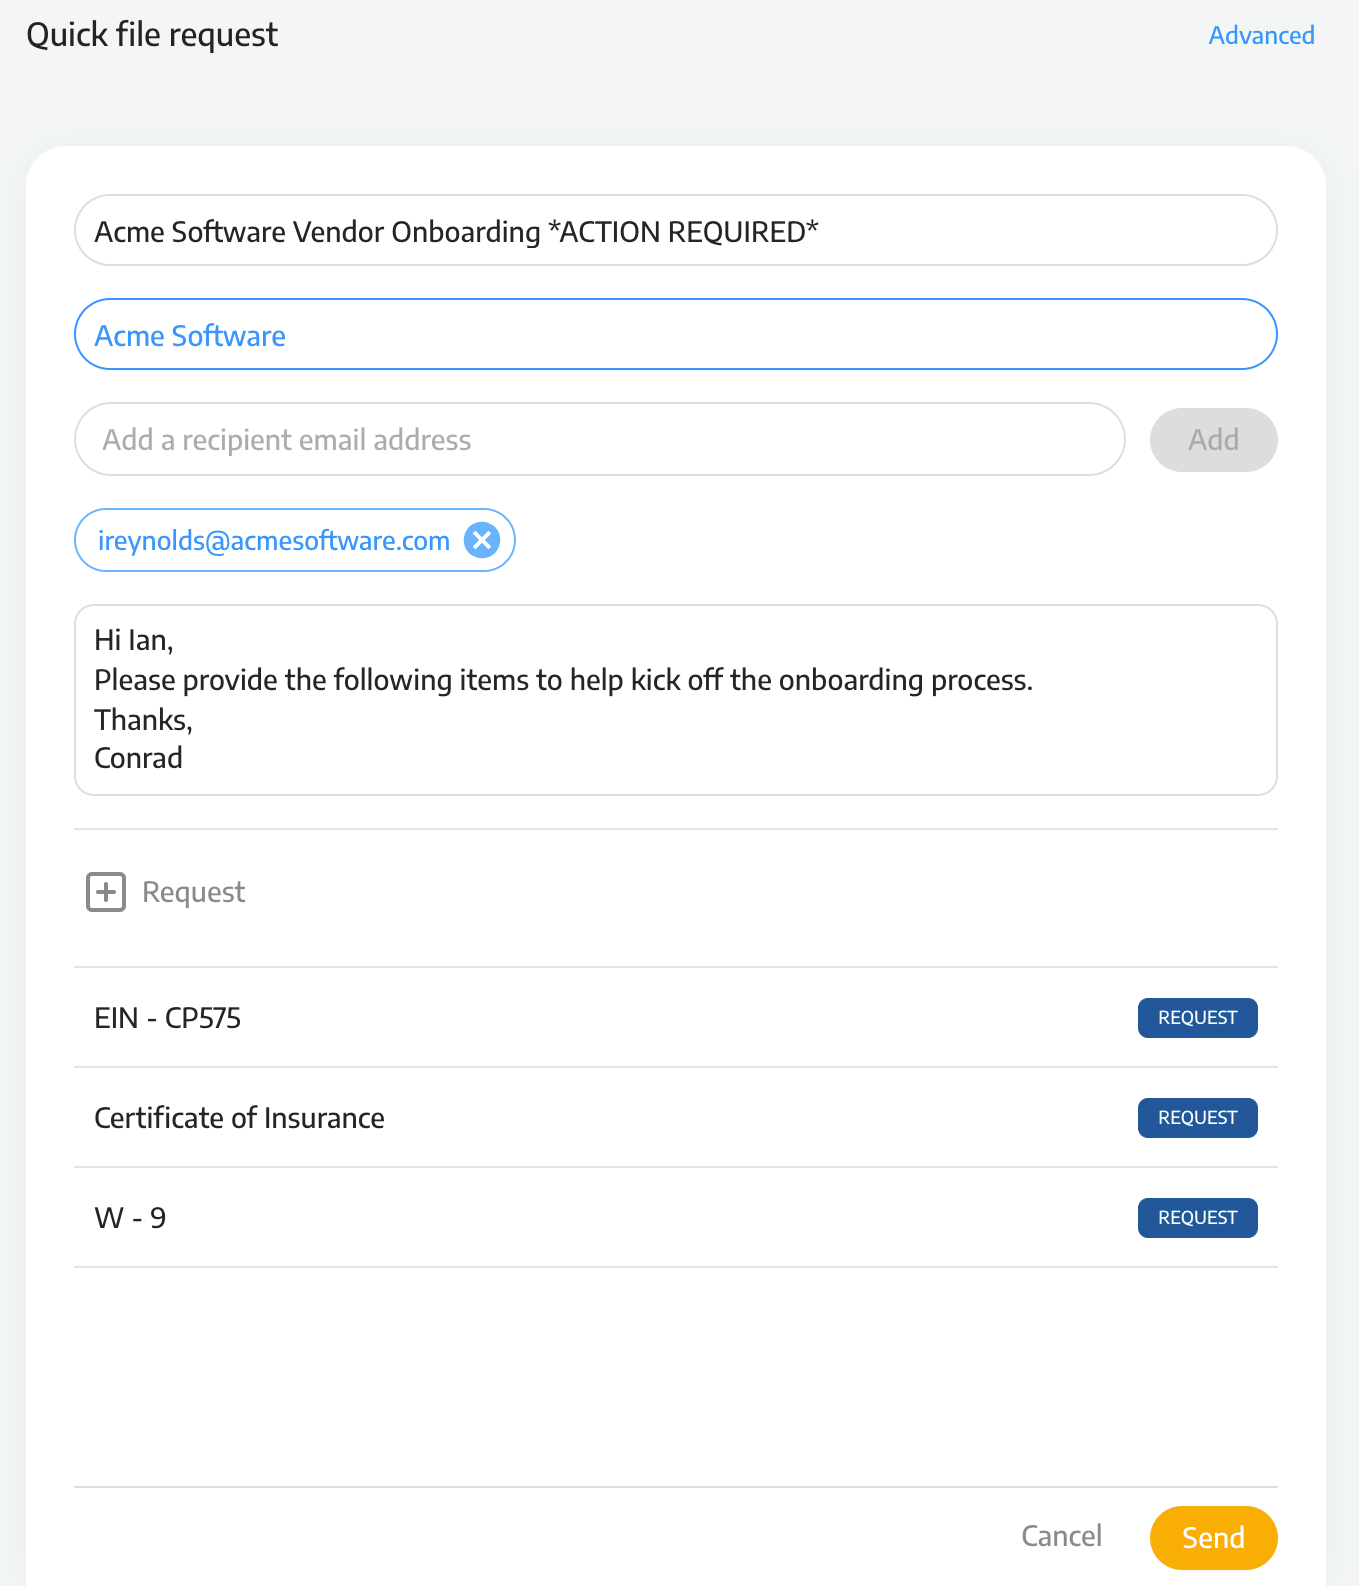 |
Add the party name, the email addresses of the individuals you’re sharing files with, and either files or document requests.
Click Send to share files or make requests.
💡Tip |
|---|
Clicking on the “advanced” link at the top of the Quick File Share or Quick Flie Request will launch the standard Create a Flow. |